Embarking on a photo safari is an exhilarating adventure that combines the thrill of wildlife encounters with the artistry of photography. Capturing the raw beauty of nature and its inhabitants requires more than just pointing and shooting. It demands a blend of technical skill, creative vision, and deep respect for the environment. Whether you’re venturing into the vast savannas of the Serengeti or exploring the lush landscapes of Kruger National Park, being well-prepared can make the difference between good shots and breathtaking images that tell compelling stories.
Essential camera equipment for wildlife photography
The cornerstone of any successful photo safari is having the right gear. While it’s true that the photographer’s eye is crucial, having quality equipment can significantly enhance your ability to capture those fleeting moments in the wild. Let’s delve into the key components of a well-equipped safari photographer’s kit.
Telephoto lenses: from 200mm to 600mm focal lengths
When it comes to wildlife photography, telephoto lenses are your best friends. These lenses allow you to zoom in on distant subjects without disturbing their natural behavior. A versatile range to consider is between 200mm and 600mm. The longer focal lengths, such as 400mm or 600mm, are ideal for capturing detailed portraits of animals or birds from a safe distance. However, don’t overlook the importance of shorter telephoto lenses like 70-200mm, which can be perfect for environmental shots that include the animal and its habitat.
Camera bodies: high ISO performance and fast autofocus
The heart of your photography setup is the camera body. For safari photography, two key features stand out: high ISO performance and fast autofocus. High ISO capability allows you to shoot in low light conditions, such as during dawn and dusk when many animals are most active. Fast and accurate autofocus is crucial for tracking moving subjects, ensuring you don’t miss that perfect moment when a cheetah sprints or a bird takes flight.
Tripods and monopods: stability in varied terrains
Stability is paramount in wildlife photography, especially when using long lenses. A sturdy tripod can be invaluable for landscape shots or when photographing from a fixed position. However, in a safari vehicle, a monopod often proves more practical. It provides stability while allowing for quicker repositioning. Some photographers even opt for specialized window mounts or bean bags that can be draped over the vehicle’s door for support.
Memory cards: speed and capacity for burst shooting
Wildlife moments are often fleeting, and you’ll likely find yourself shooting in burst mode to capture the perfect frame. High-speed memory cards with large capacities are essential. Look for cards with fast write speeds to keep up with your camera’s burst rate. It’s also wise to bring multiple cards to avoid running out of storage space during your safari adventure.
Mastering safari vehicle photography techniques
Once you’re equipped with the right gear, it’s time to focus on technique. Shooting from a safari vehicle presents unique challenges and opportunities. Mastering these techniques will significantly improve your chances of capturing stunning wildlife images.
Bean bags vs. window mounts: stabilization options
In the confines of a safari vehicle, traditional tripods are often impractical. This is where bean bags and window mounts come into play. Bean bags are versatile, allowing you to quickly adjust your position and provide a stable base on any part of the vehicle. Window mounts, on the other hand, offer a more rigid support but can be limiting in terms of movement. Many photographers opt for a combination of both, using bean bags for general shooting and window mounts for situations that require extended periods of stability.
Panning shots: capturing motion in serengeti plains
The vast plains of places like the Serengeti offer perfect opportunities for panning shots. This technique involves following a moving subject with your camera, using a slower shutter speed to create a sense of motion. To execute a successful panning shot, set your shutter speed between 1/15th and 1/60th of a second, depending on the speed of your subject. Practice smooth, horizontal movement of your camera as you track the animal. The goal is to keep the subject sharp while blurring the background, conveying a dynamic sense of movement.
Exposure compensation in high contrast environments
African landscapes often present high contrast scenes, with bright skies and dark shadows. Your camera’s metering system might struggle to find the right exposure in these conditions. This is where exposure compensation becomes crucial. If your subject is darker than the overall scene, you might need to dial in positive exposure compensation to avoid underexposure. Conversely, for bright subjects against darker backgrounds, negative compensation may be necessary. Experiment with different settings and always check your histogram to ensure you’re capturing the full range of tones.
Safari-specific composition strategies
Composition is what transforms a simple snapshot into a compelling photograph. In the context of safari photography, understanding how to effectively compose your shots can make your images stand out. Let’s explore some strategies tailored to the unique environments and subjects you’ll encounter on safari.
Rule of thirds applied to Savanna landscapes
The rule of thirds is a fundamental principle in photography, and it’s particularly effective in capturing the expansive savanna landscapes. Imagine your frame divided into a 3×3 grid. Place key elements of your composition along these lines or at their intersections. For instance, position the horizon along the upper or lower third line, rather than cutting the image in half. This creates a more dynamic and engaging composition. When photographing animals, try placing them off-center, giving them space to “look” or move into within the frame.
Negative space in Big Five portraits
When photographing the Big Five (lion, leopard, elephant, rhino, and buffalo), don’t be afraid to use negative space to your advantage. Negative space is the area surrounding the main subject of your photograph. By incorporating ample negative space, you can create a sense of isolation or emphasize the animal’s environment. This technique is particularly effective for creating powerful, minimalist portraits. For example, a lone elephant against a vast sky can convey a sense of scale and solitude that a tightly cropped shot might miss.
Incorporating environmental context: Maasai Mara backdrops
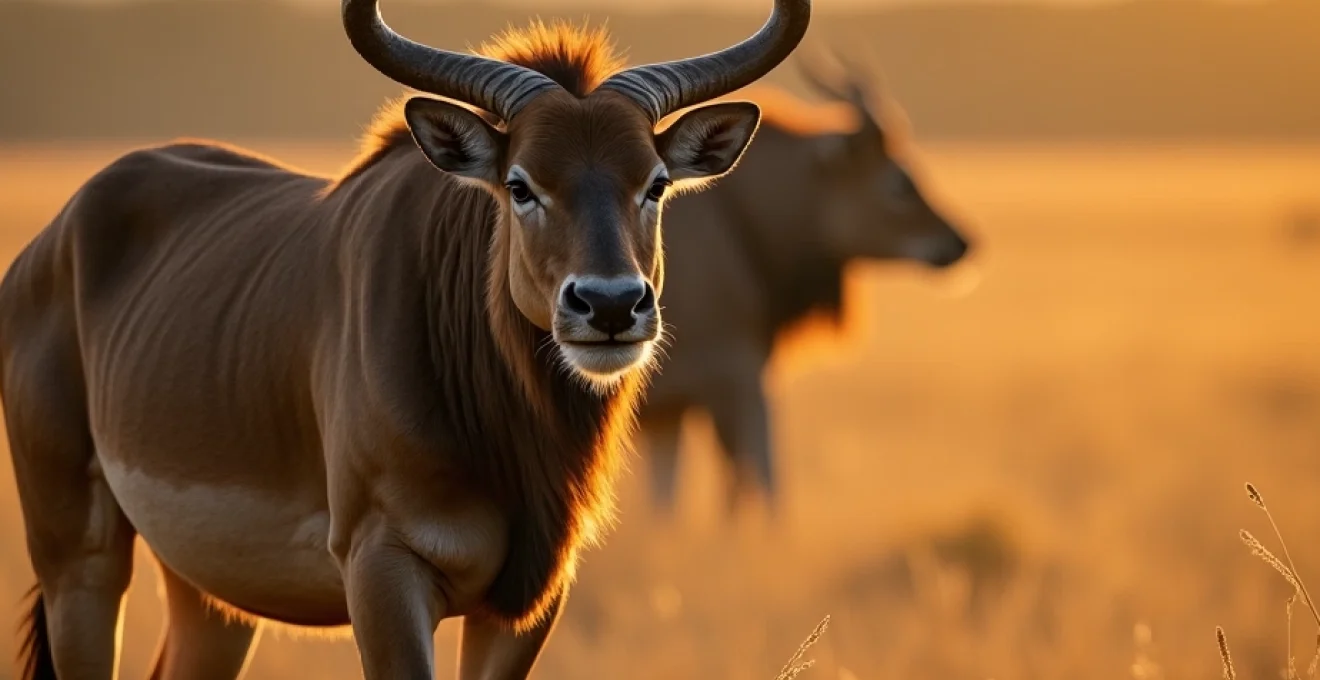
While close-up animal portraits are captivating, don’t forget to capture the broader context of the animal’s environment. The Maasai Mara, for instance, offers stunning backdrops that can elevate your wildlife shots. Include elements like acacia trees, dramatic skyscapes, or golden grasslands to tell a more complete story. These environmental shots not only showcase the animal but also give viewers a sense of place, enhancing the narrative quality of your images.
Ethical wildlife photography practices
As photographers, we have a responsibility to practice our craft ethically, especially when it comes to wildlife. Ethical considerations should always take precedence over getting the “perfect shot.” Let’s explore some crucial guidelines for ethical wildlife photography on safari.
Maintaining safe distances: guidelines by species
Respecting an animal’s space is paramount. Different species have different comfort zones, and it’s essential to know and adhere to these boundaries. As a general rule, if an animal changes its behavior due to your presence, you’re too close. For larger animals like elephants and rhinos, maintain a distance of at least 50 meters. For predators like lions and leopards, stay at least 30 meters away. These distances may vary based on the specific situation and the animal’s behavior. Always defer to your guide’s expertise on safe distances.
Understanding animal behavior: reading warning signs
Being able to read animal behavior is crucial for both safety and ethical photography. Learn to recognize signs of stress or agitation in different species. For example, an elephant flapping its ears and trumpeting might be a warning sign. Lions may swish their tails or flatten their ears when annoyed. By understanding these cues, you can adjust your behavior to avoid causing distress to the animals. Remember, a stressed animal not only makes for poor photographs but also raises ethical concerns about the impact of your presence.
Collaborating with local guides: Kruger National Park protocols
Local guides are invaluable resources for ethical wildlife photography. They possess in-depth knowledge of animal behavior and park regulations. In places like Kruger National Park, guides are well-versed in protocols that ensure both visitor safety and animal welfare. Always follow their instructions regarding positioning your vehicle, respecting wildlife right-of-way, and knowing when to move on from a sighting. Their expertise can also lead you to photographic opportunities you might otherwise miss, all while maintaining ethical standards.
Post-processing workflow for safari images
The journey of creating stunning safari photographs doesn’t end when you press the shutter. Post-processing is an integral part of modern digital photography, allowing you to refine and enhance your images. However, it’s important to approach post-processing with a light touch, aiming to enhance rather than drastically alter the natural beauty you’ve captured.
RAW file management: lightroom catalog organization
Managing the sheer volume of images from a safari can be overwhelming. Adobe Lightroom is an excellent tool for organizing and processing your RAW files. Start by creating a logical folder structure within your Lightroom catalog. You might organize by date, location, or animal species. Use keywords generously to make your images easily searchable later. Collections in Lightroom can be particularly useful for grouping your best shots or creating themed sets of images.
Color grading: enhancing african golden light
The golden light of African sunrises and sunsets is one of the most magical aspects of safari photography. In post-processing, you can enhance this natural beauty through careful color grading. Start by adjusting the white balance to accurately represent the warm tones. Use the HSL (Hue, Saturation, Luminance) panel in Lightroom to fine-tune specific colors. For instance, slightly increasing the luminance and saturation of orange and yellow can enhance the golden glow without making it look artificial. Remember, the goal is to enhance the natural beauty, not create an unrealistic scene.
Noise reduction techniques for low-light captures
Many of your most dramatic safari shots may come from low-light situations, which often introduce noise into the image. Effective noise reduction is crucial for maintaining image quality. In Lightroom, use a combination of luminance and color noise reduction. Start with a moderate luminance noise reduction setting, around 20-30, and adjust based on the image. Be cautious with color noise reduction, as too much can lead to a loss of detail. For more challenging images, consider using specialized noise reduction software like Topaz DeNoise AI or DxO DeepPRIME, which can produce remarkable results while preserving image detail.
By mastering these essential aspects of safari photography – from selecting the right equipment to ethical practices in the field and effective post-processing techniques – you’ll be well-prepared to capture breathtaking images that do justice to the magnificent wildlife and landscapes of Africa. Remember, patience and respect for nature are your greatest assets on a photo safari. Each journey offers unique opportunities to grow as a photographer and to create images that not only showcase the beauty of the natural world but also inspire conservation efforts.